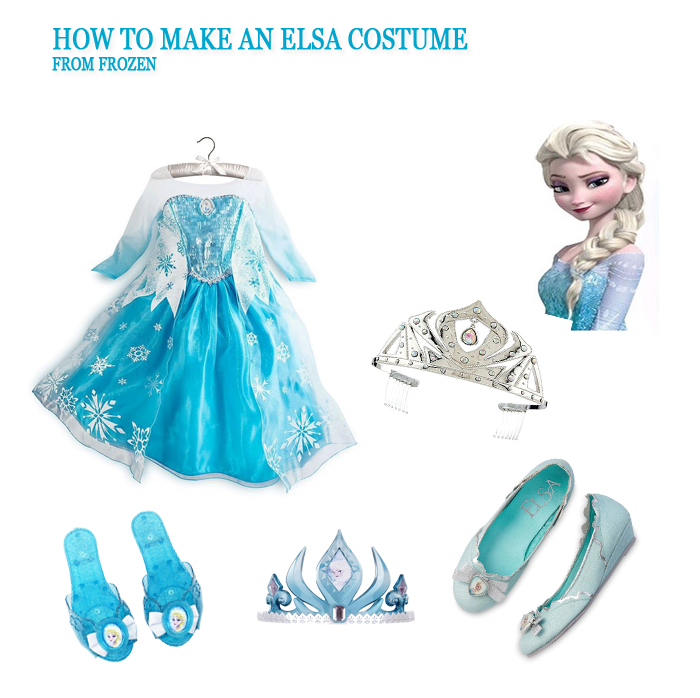
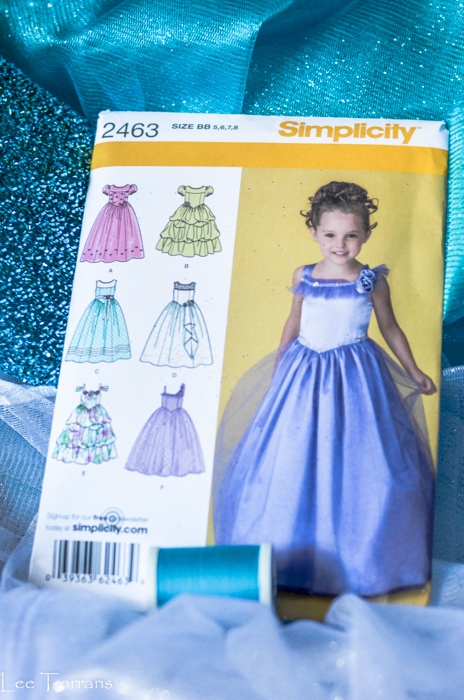
Making the Skirt for Elsa from Frozen
|
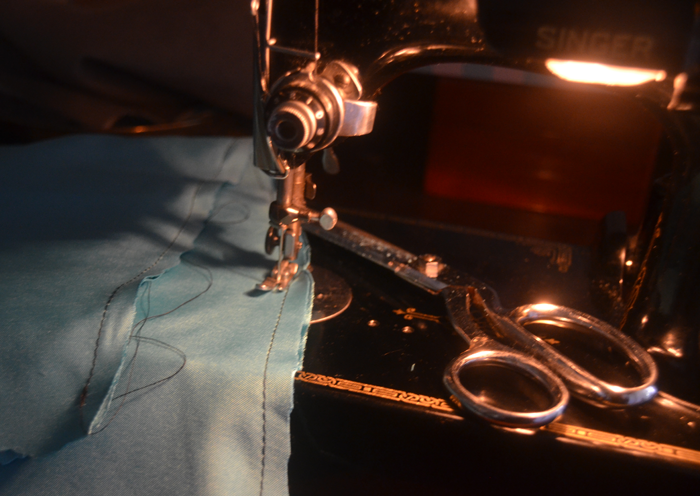
| The Elsa costume is being made at home with no fancy equipment. I am using my grandmother’s 1952 Singer Featherweight sewing machine, on a 1922 desk, a measuring tape and a good pair of scissors. My point is, an Elsa costume can be created with the simplest of dressmaker tools. Normally I would use matching thread but have chosen black for the contrast. |
|
|
| I would encourage you to purchase one good pair of sewing scissors and not try to cut this with cheap scissors. I use my grandmothers eight inch Gingher Sewing Scissors.These have been resharpened fifty times at least. I use a whetstone to sharpen the scissors between professional sharpening. Professional sharpenings are only required when I make an error and cut over a pin, nicking the knife edge scissors. |
|
|
|
|
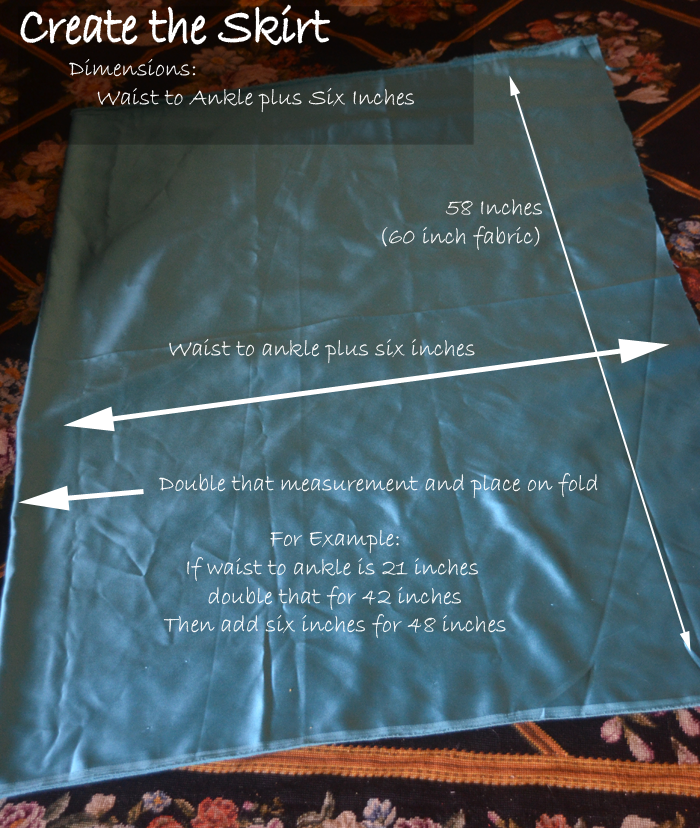
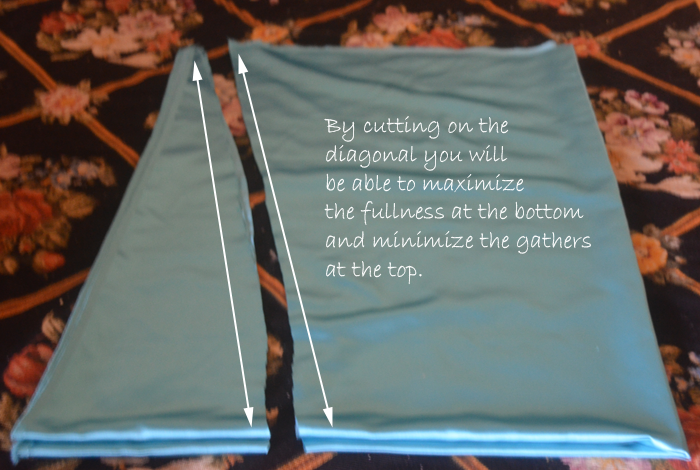
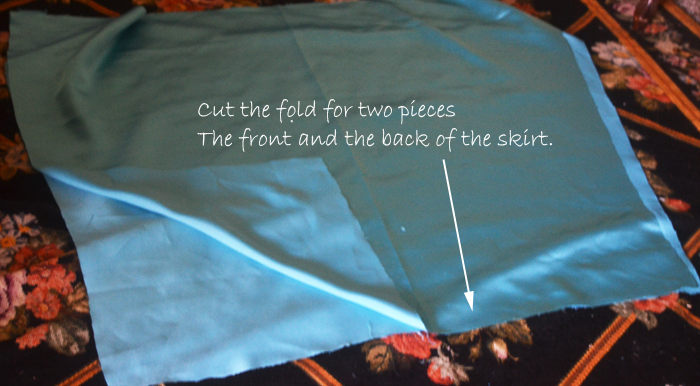
| I believe that making the skirt can be incredibly simple and will work as your child grows. I am making the skirt separate from the costume for these reasons. Here is how to cut out your skirt without a pattern. I have placed this on my black rug for contrast. |
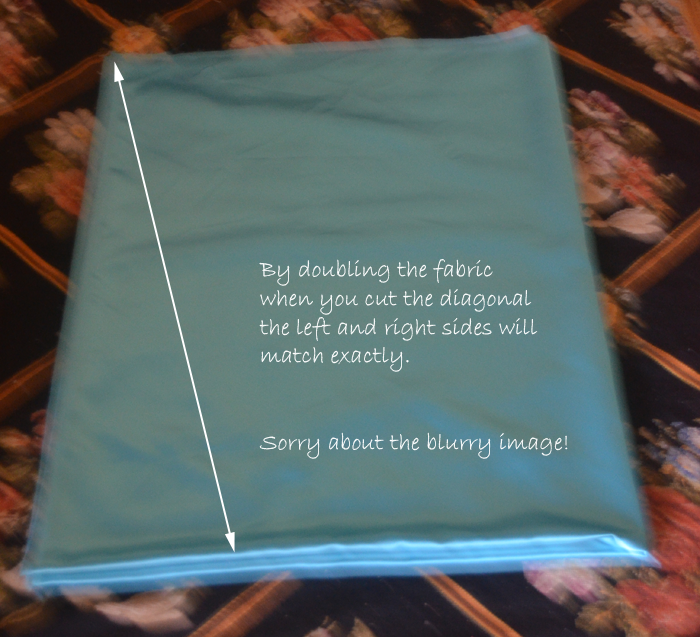
| This is DIY = and I apologize that some of the images are blurry. The next group will be better. The images do make the point! |
|
|
|
|
|
|
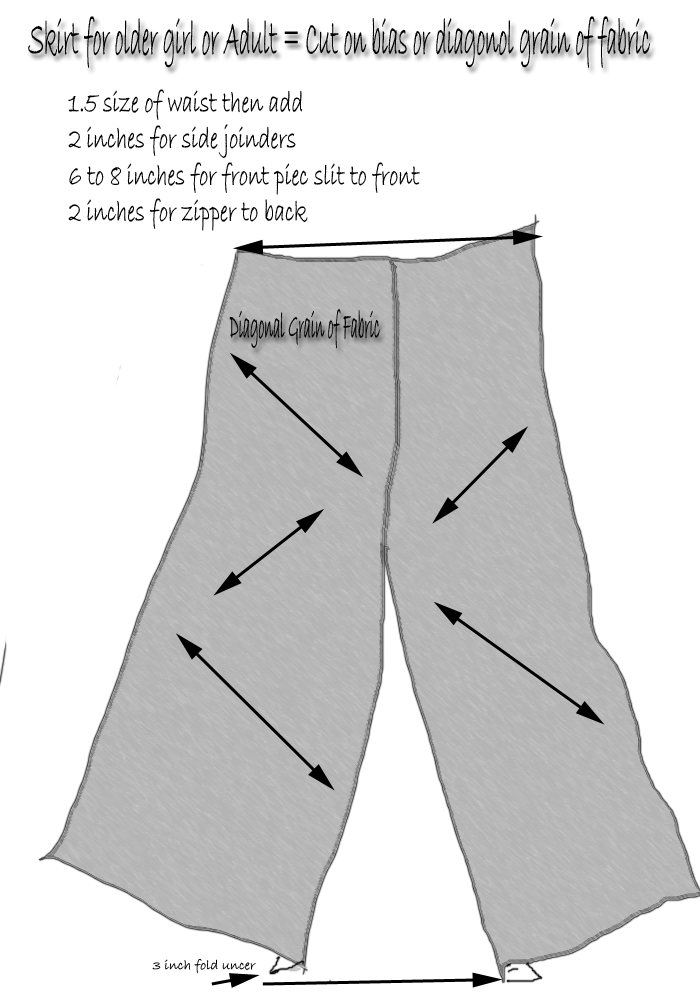
| The next decision you must make is whether or not to put a zipper in the skirt. Certainly once can be added to the side or the back can be cut in half and a zipper can be added there. I have decided, no zipper. |
| The decision whether or not to add a zipper will turn on the ratio between the hips and the waist. If you are working with a small child where these measurements are similar, there is no need for a zipper. Where there is a large difference between the waist size and the hip size, put a zipper in. |
|
|
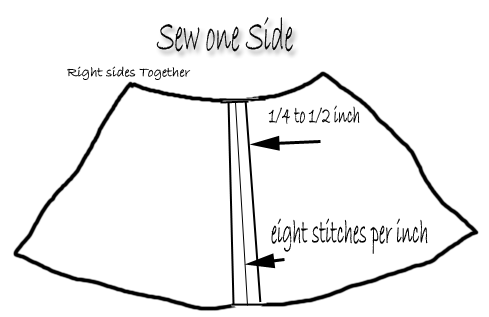
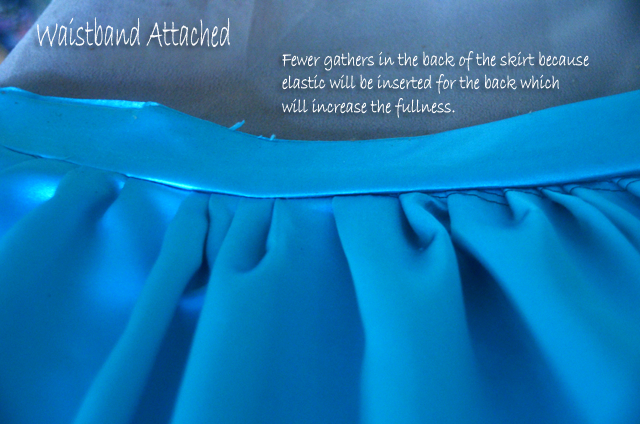
| Sew the front to the back on one side and press open the seam. Make sure the top seam is very strong because the elastic will be inserted or attached here placing stress on that seam at the top that the lower part of the seam will not experience. |
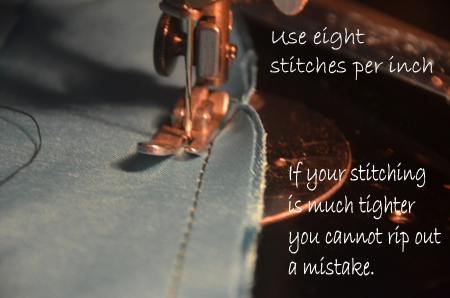
| Thread: Only use heavy weight cotton thread. DO NOT USE THAT POLYESTER JUNK. The thread will be very important when you put in your gathering stitches. You will need a heavy-weight cotton thread to gather heavy fabric. |
| Press open your seams. Pressed seams make construction much easier. For the skirt the hem below will be less bulky with a pressed open seam. The elastic will lay better on a flat, pressed open seam. |
|
|
| Only sew the ONE side. Leave one side open as you insert your elastic. This just makes the process easier. |
Gather the Skirt
|
|
|
| About Gathering: A full skirt typically is three times the waist size and gathered. This costume does not call for that extensive fullness in the skirt. I have decided to gather two times the waist size. |
| Cutting on the Bias: Bias cut fabric hangs differently than fabric cut with the grain. For more mature girls and adults use fewer gathers and cut the skirt on the bias for a more luxurious drape. Most of the 40’s glamour evening gowns were bias cut. |
|
| Cased Elastic Waistband: Once this fabric for the skirt is gathered cut a waistband. Take the waist measurement and and five inches. Sew the waste band to the skirt fabric, right sides together. |
|
|
Cutting and Attaching the Waistband
|
| So far, multiple issues and mistakes on my part. In sewing, as in cooking and often in life, there are few mistakes for which you cannot compensate. I cut my waistband too narrow. I simply added a piece to the waistband and kept on going. This is wonderful thing about costumes. They are soooooooo forgiving! |
| At one end of the skirt attach the waist band exactly to the edge of the gathered skirt with a fold-over of the skirt. At the other end of the waistband leave two inches: one half an inch for your seam and an inch and a half for your attachment. |
|
|
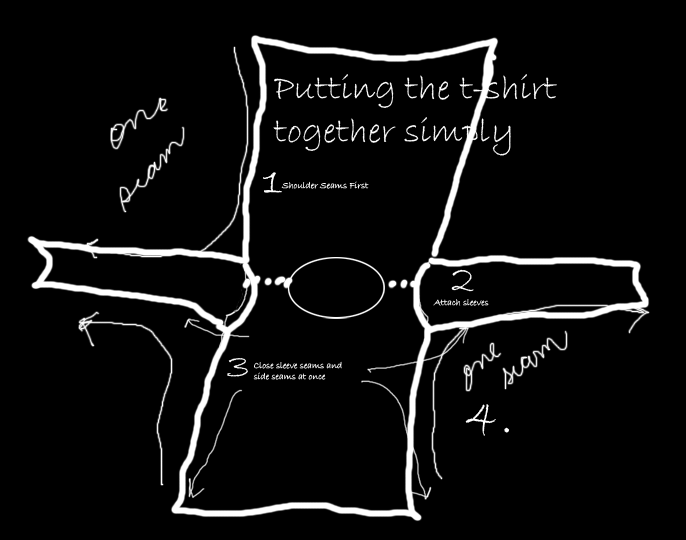
The Elsa Top Pattern
|
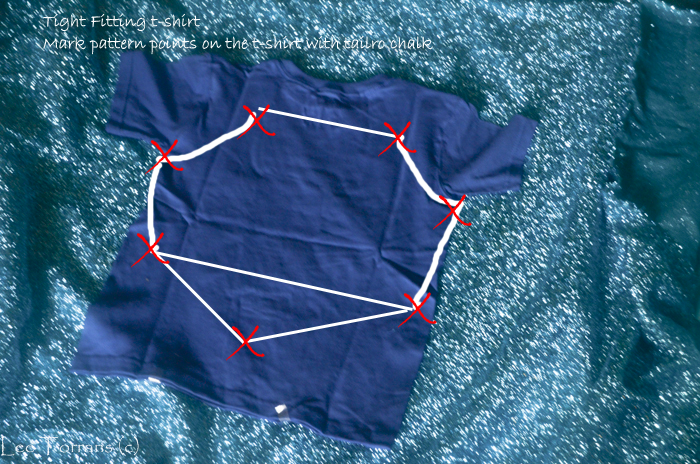
| Find a tight fitting t-shirt to make a pattern for both the sparkly top and the white mesh knit undershirt. The “X” points signify the waist line and other important pattern points. Make the x’s with tailor chalk and create your first pattern! |
|
|
| My rusty sewing skills demanded stretch fabric for this top! No darts and seams, just one side seam and a very good fitting pattern. (I hope!) |
| Step one: Place the t-shirt at the edge of the fabric on the bottom. Fold the fabric so you are cutting BOTH the front and the back. |
| Step two: Cut left and right sides up to the armhole. |
| Step three: Cut the right armhole and the top half way across. Then fold the cut pat over the uncut part and cut the last half of the top and the left armhole based on the right half which is already cut. |
|
|
| Once the first cut is made you may want to deepen the armholes. Because I have chosen a stretch fabric no darts or zippers. Just pull this on — and hope it fits. You can always make it smaller. Making it larger can mean a complete recut or at least side panel fabric additions if you do not have enough fabric for a complete recut. |
|
|
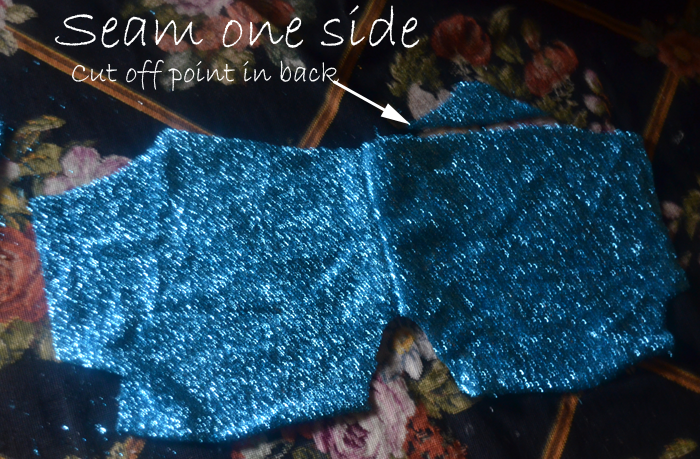
| By stitching all but one side seam I can fit this top and make minor adjustments for size from only that one side. (I hope!) |
|
|
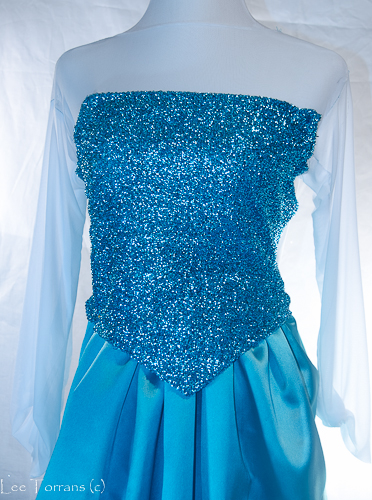
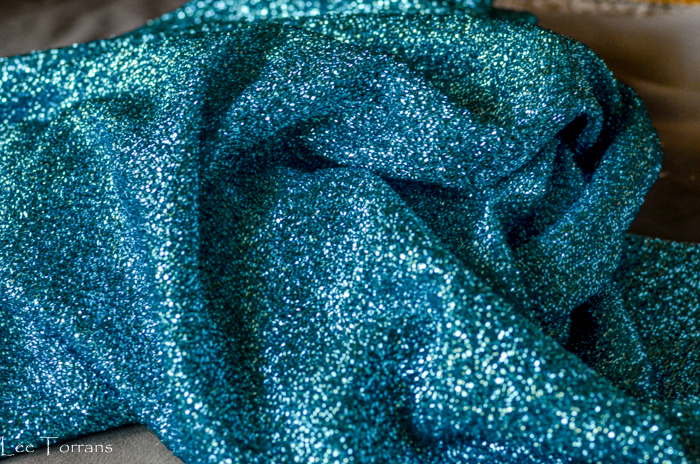
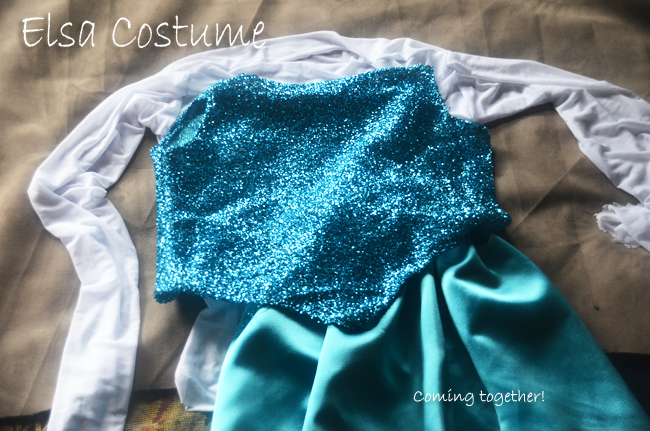
| I have run into a small problem. The front point does not want to lay flat. This most likely means some iron on interfacing with supportive lining. Just a bit more work here. |
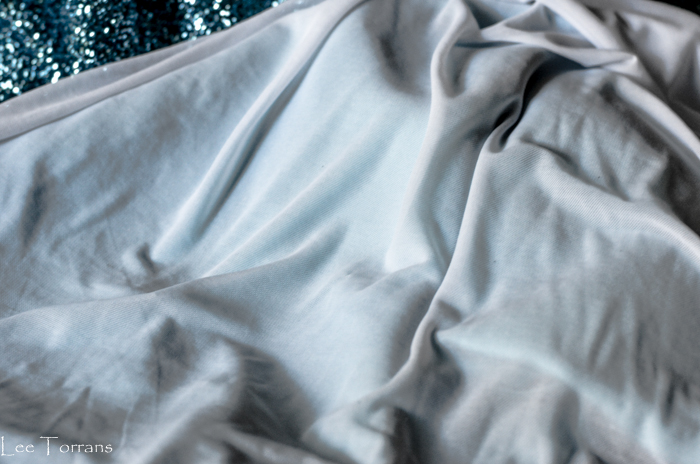
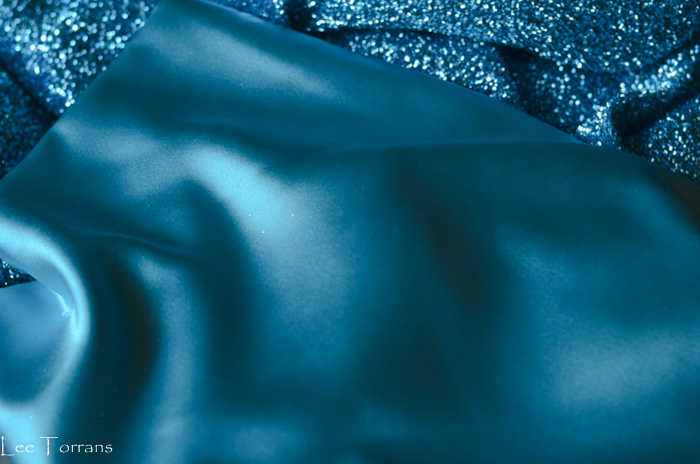
| The fabric is a bit scratchy and I am hopeful the undershirt made of the white mesh will overcome that issue. Otherwise the top must be lined with most likely, some satin used on the skirt. This means darting and zippers. |
|
|
| The performance mesh fabric is slippery but wonderfully stretchy and comfy. I am excited that such wonderfully soft fabric will be skin-side for this costume and hopeful the scratchiness of the sparkly top will not come through. |
| When sewing a t-shirt I always sew the two shoulder seams, open up the t-shirt and then attach the arms. |
|
|
| The t’shirt neckline continues to remain ‘uncut’. The neckline is just the straight cut I made across the top. It rolls nicely but will certainly make some fabric neckline trim when the t-shirt is tried on. |
| I love the feel of the t-shirt and hope this will be a big hit. I am concerned the arm holes are not quite large enough. If that is the case will simply open up the seams under the armholes and add a gusset. |
|
|
|
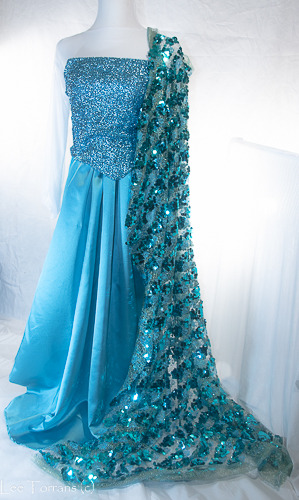
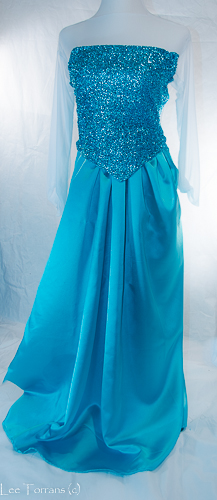
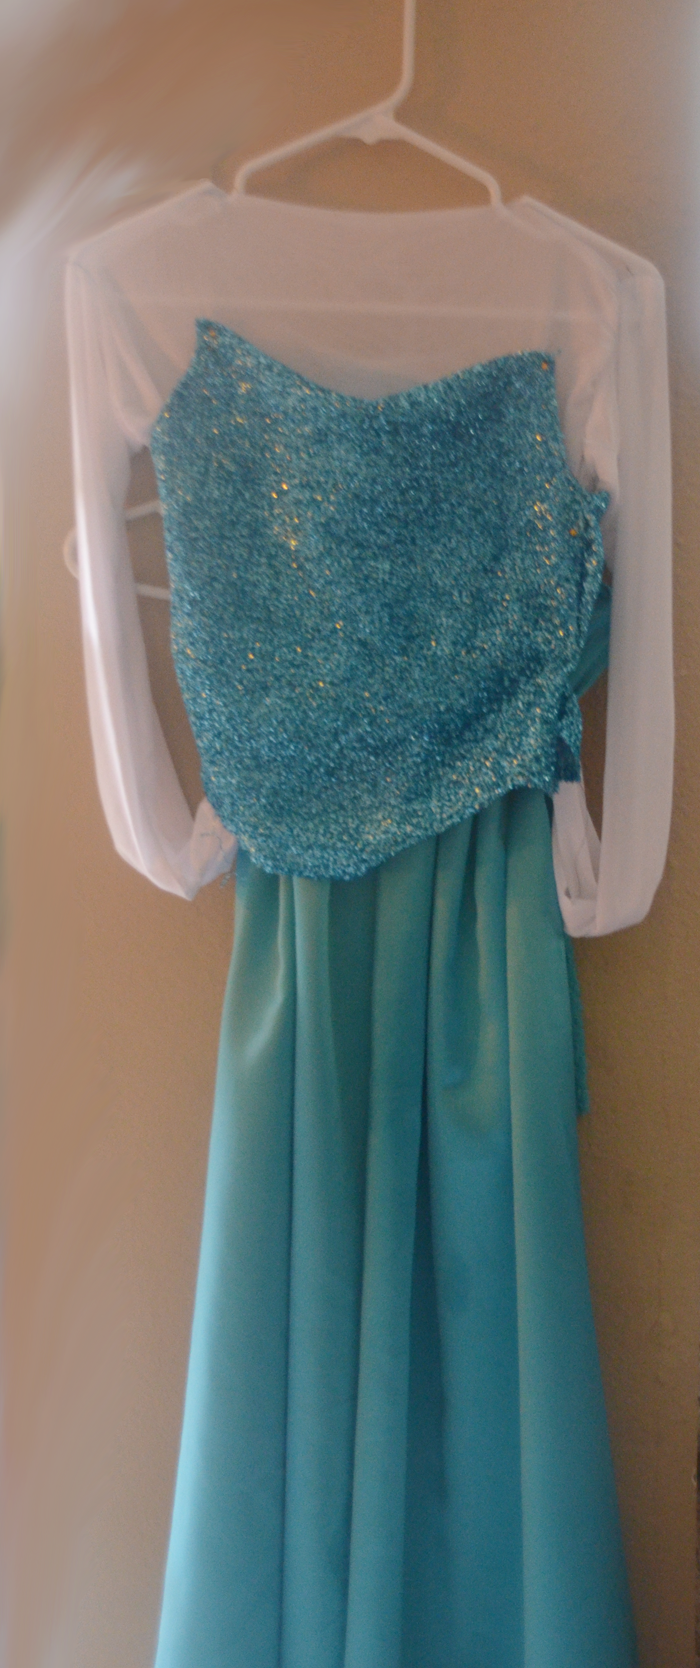
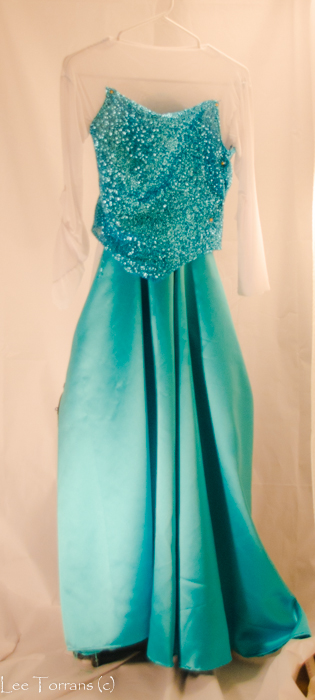
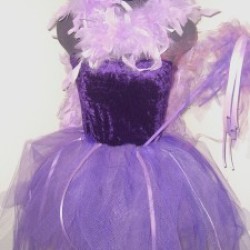
| It looks like for a little girl the bodice will require some straps. I am incredibly happy with the neckline. I also like the hang of the skirt … however, I am very much aware how much girls love ‘poofy’ and wonder if this will be well received. Already, I am considering the addition of a petticoat for more skirt fullness. I am quite sure the mesh top will block out any itch factor associated with the scratchy bodice fabric. |
|
|
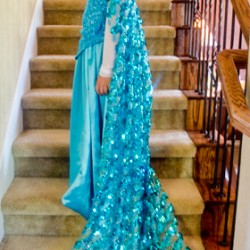
| The hang and flow of the skirt is just right. Elsa does not have a big gathered skirt. This worked perfectly. |
|
How to Make a Costume for Elsa from Frozen |
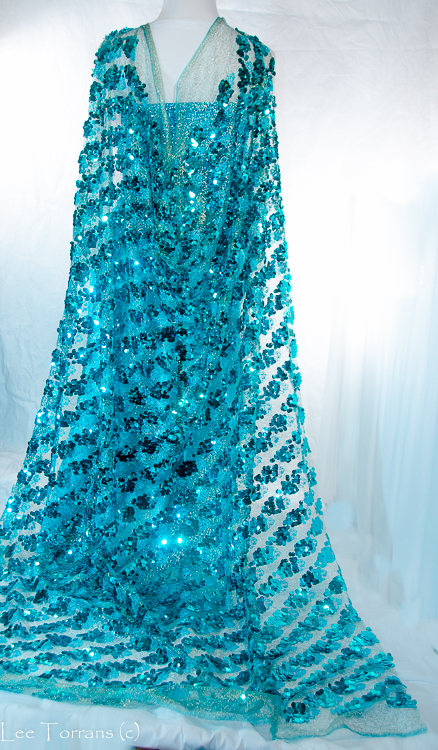
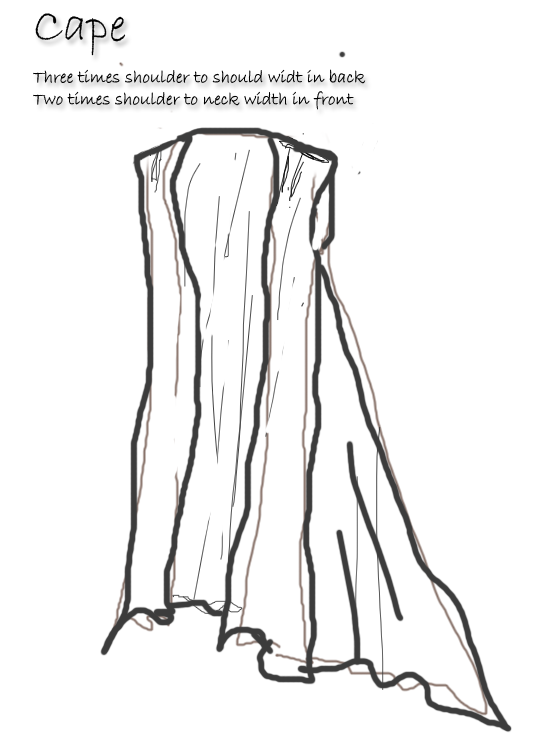
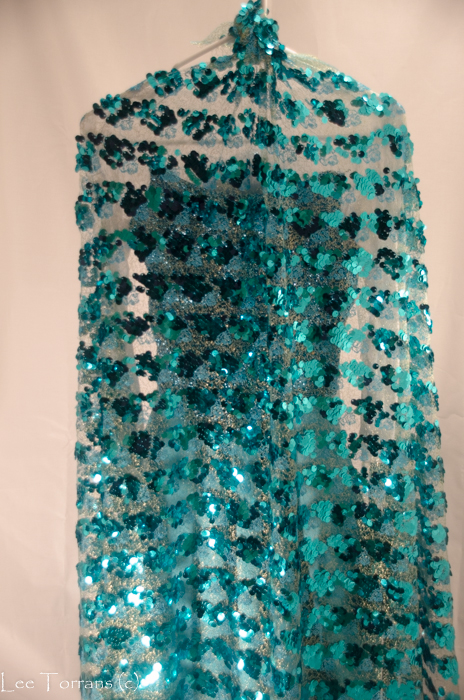
The Elsa Cape
|
| Not so thrilled with this cape. Made a second cape which is wonderful but did not photograph so great. Here is the first cape. |
|
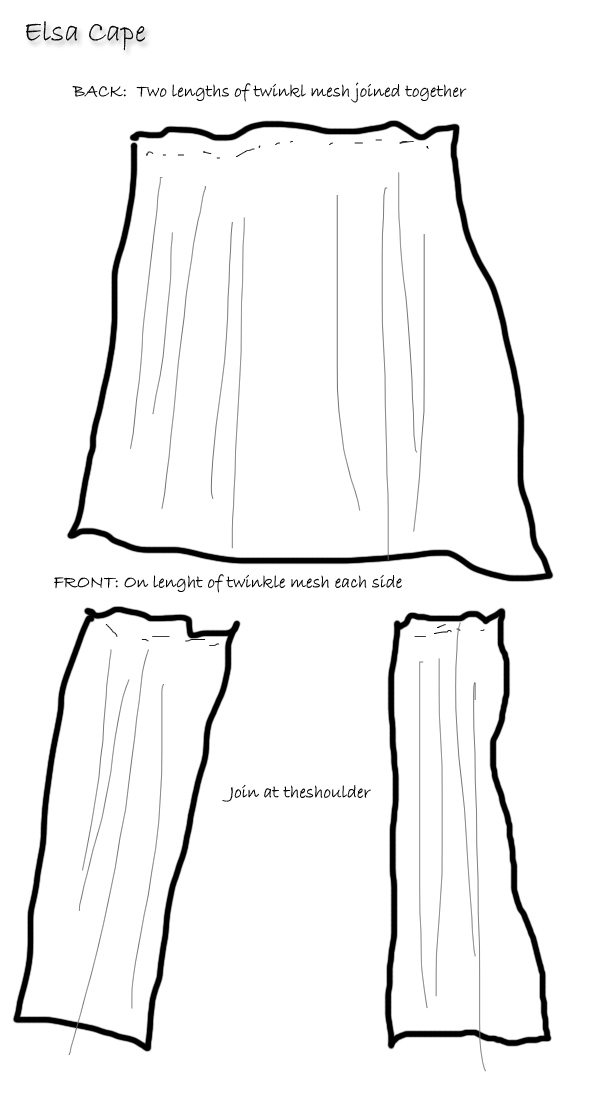
First Elsa Cape
|
|
|
| Did not use this cape. Tried something more ornate and stuck with that. This cape was so simple to make. I used two lengths joined together in the back and gathered. One length for each side for the front gathered. Then I joined the shoulder seams. |
|
|
|
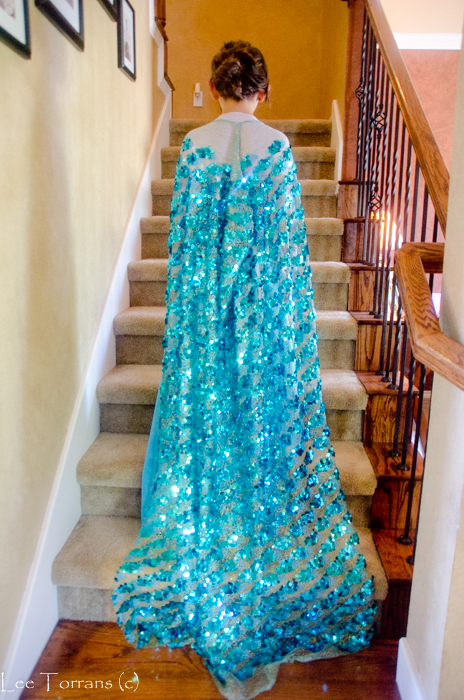
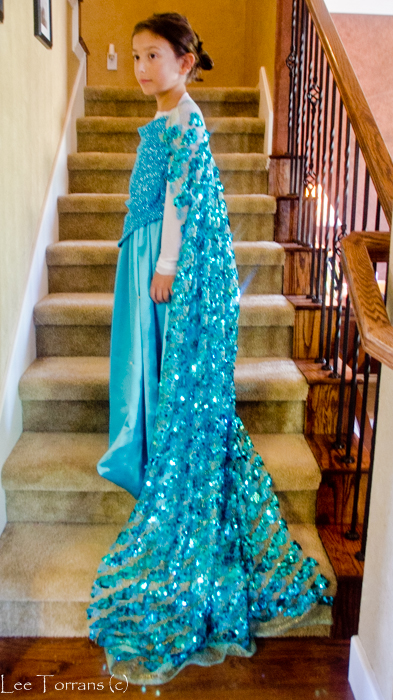
How to make the cape from Frozen for Elsa |
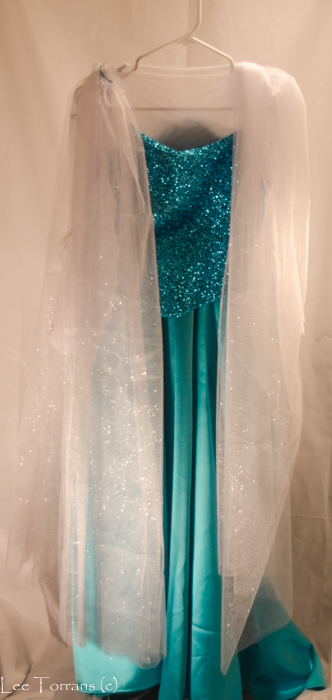
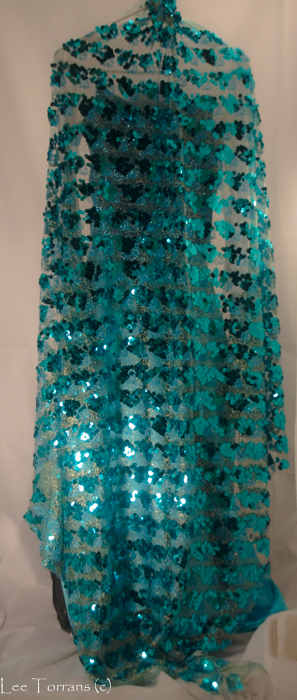
Second Elsa Cape
|
|
|
| This is a costume for running and playing – not for stage and that impacts many decisions. I want a cape that flows from the back with a bit of a drag for a romantic and luxurious look. For the youngest of children this is not a good idea because their feet can get tangled in the cape and they will fall. |
|
|
| I also want a cape that will be easy to wear and flow. I have decided to make a kimono like cape with armholes and a front piece, very narrow in the front and gathered and full in the back. |
|
How to Make an Elsa Cape from Frozen |
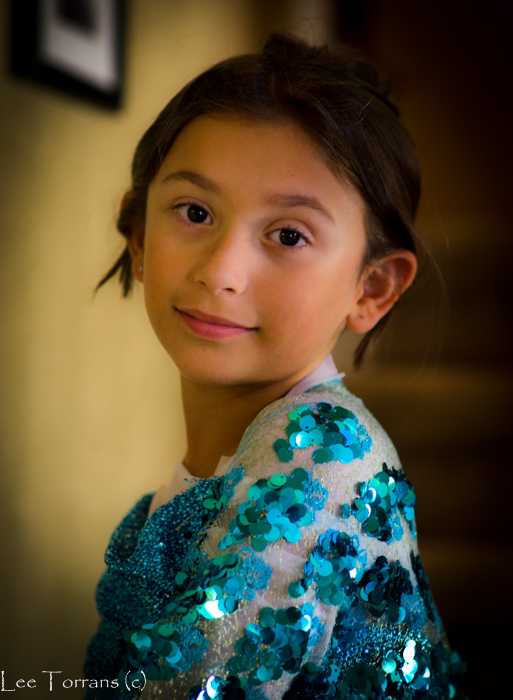
| Time to try this on my favorite little girl! |


