
Duct Tape Bodice or Duct Tape Corset required two rolls of black and one of purple duct tape.
You can use just one layer for a pattern or all one color — we used purple for demonstration purposes only.
One roll makes one bodice – barely.
Select an old t-shirt and tight, because this will go next to your skin.
- You want as much comfort as possible.
- You can use Saran wrap but that is not all that comfortable.
- Make your first layer tight. It is not possible to tighten it up later.


- Pull the t-shirt tight and cut up the back. Cut away the excess.
- It does not matter if there is an overlap.
- You can trim the overlap when you cut the bodice/corset off.

- Begin wrapping horizontially from the bottom to the top.
- Overlap the duct tape by half.

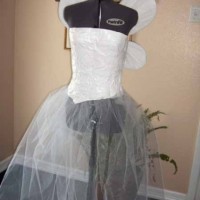
Smooth out bubbles. This is the first duct tape layer of the duct tape bodice. There will be two more layers.

- The second layer is added vertically.
- We have used purple for contrast.
- You can use the same color.
- Use small strips in the curvey areas.
- Smooth out bubbles.
- You can see the boning, drinking straws. These give the bodice – corset another dimension which we really liked.
The purple tape represents the second duct tape layer of the duct tape bodice if you decide to do a second layer.


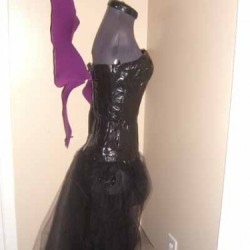
- Third layer is your choice: horizontal or vertical. We chose horizontal and black.

- Finish off the top to make more sturdy.

Fold duct tape over the top to give a nice finish look for your duct tape corset.
Lee Ann Torrans
ltorrans@gmail.com


